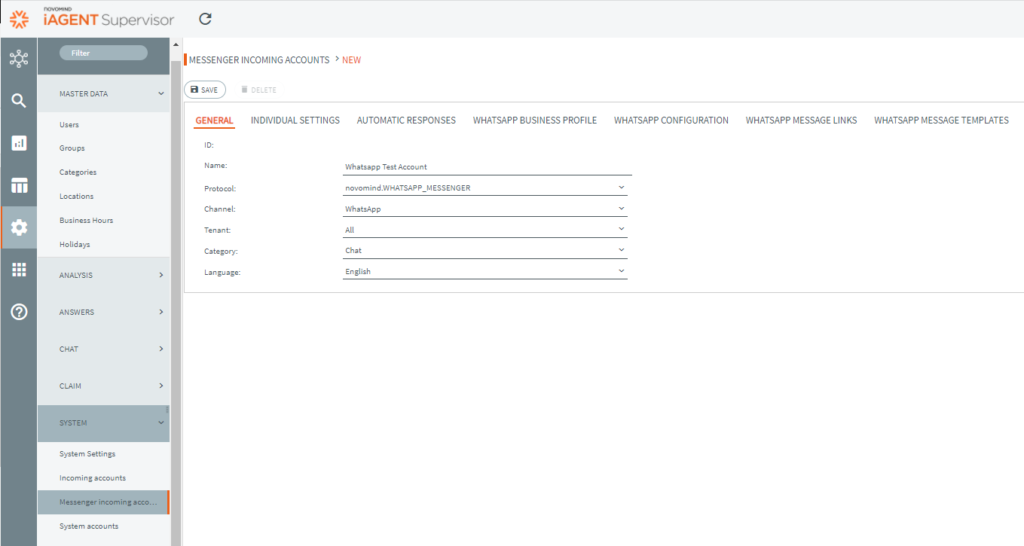
The very first step is uploading and activating the respective messenger App in Administration –> System –> Apps, in this case it’s Messenger Connector for WhatsApp. Then you can add a new Messenger incoming account as described. Choose protocol novomind.WHATSAPP_MESSENGER, then channel WhatsApp. In the picture the category name is Chat. What category you use, depends on the settings of your system. In any case it must be a category with Chat enabled.
After initially saving your account, new tabs appear with “WHATSAPP CONFIGURATION” among them. Open it and enter the Api Key you have been given by your project leader.
Expand the section ENHANCED SETTINGS. Verify the URL entered here, correct it if it’s not the one you have been given by novomind. Save the ENHANCED SETTINGS and click the CHECK CONNECTION Button. A green success message: “Successfully connected to ..<URL>” should appear now.
Click the SAVE button on top of the page. Now the (WhatsApp) client is displayed. At the lower end of the page you can select an account of the client from a list. Select and SAVE page again. Congratulations, your account has been configured. You can now find detail information like WhatsApp ID (equals the phone number), Business Account ID, phone number ID (this is not the phone number but an internal ID of the phone number).
Remember to activate your account: go back to the overview page of all messenger incoming accounts, tick your WhatsApp account and ACTIVATE.
At last ready for use!
You can look up how to create an account for an external messenger service in general in the Supervisor Handbook, chapter Administration –> System –> Messenger Incoming Accounts.