Inhalt/Content
Introduction
Groups establish the association between agents and the categories to be processed and are arranged hierarchically:
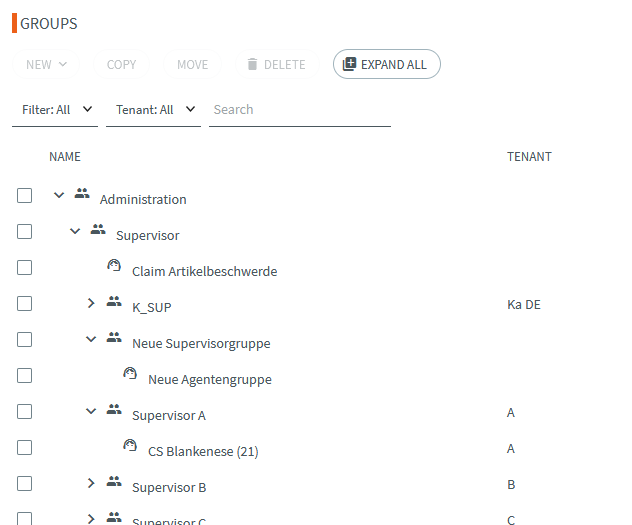
There are two different types of groups:
- System groups define groups for supervisors with the right to start the supervisor application. The agent groups that the supervisor is to supervise/control are usually arranged below the system groups. The rights of the assigned supervisors in iAGENT Supervisor are also defined on the system groups.
- Agent groups assign agents to their categories
Instructions for creating a system group
- First, select the group under which the new group is to be created in the tree view. When creating the hierarchy, make sure that supervisors from all their subordinate groups (agent and system groups) are allowed to evaluate / edit / view the agents.
- Then open the edit mask for the new creation via the button New –> System group. Fill in the name and, if necessary, tenant and description and save. The group is now created.
- Next, the users can be assigned via the Users tab. If necessary, change the filter above the list to All. Each user assigned here is on authorized to log in to the supervisor application from now on. Supervisors can also be assigned to several system groups/agent groups at the same time.
- In order for supervisors of this group to be able to execute reportings for certain categories, the corresponding categories should also be assigned to the system group via the Categories tab. It is possible to assign categories to system groups that are already assigned to other agent groups (which is not possible for agent groups, a category can only be assigned to one agent group at a time).
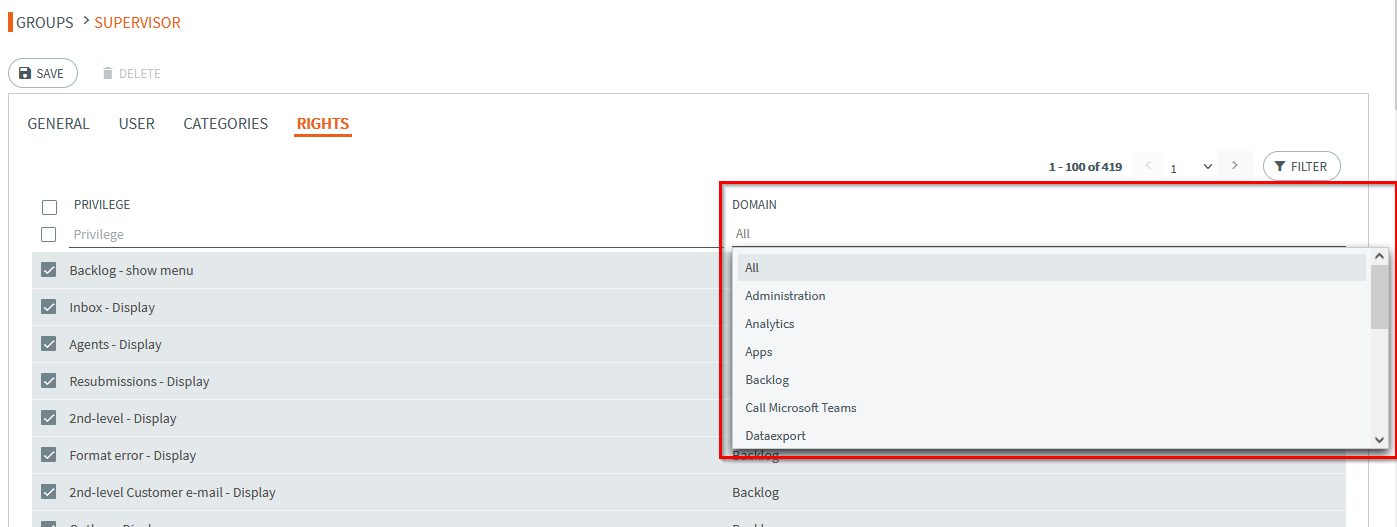
- To allow access to certain areas of the iAGENT Supervisor interface, appropriate rights must be assigned to the group. The individual rights are divided into certain domains. There is a drop-down list under Domain in which the individual rights groups are visible. The single rights are described in the iAGENT Supervisor manual.
Instructions for creating an agent group
- First, the group under which the new group is to be created is selected in the tree view.
- Then click New –> Agent group to open the editing mask for the new creation. Fill in the name and description and save. The group is now created. If necessary, the tenant results from the superordinate system group.
- Next, the users can be assigned via the Users tab. If necessary, change the filter above the list to All. From now on, every user assigned here is authorized to process calls from the likewise assigned categories. Agents who are assigned to an agent group and who also have the Agent checkmark set on their user record are allowed to log on to the novomind iAGENT Desk application. Agents can be members of several agent groups.
- On the Categories tab, the categories that the agents should be able to edit are assigned. A category can only be assigned to one group at a time – therefore it can happen that deactivated categories can be found in the listing. Consequently, these are already assigned to another agent group.