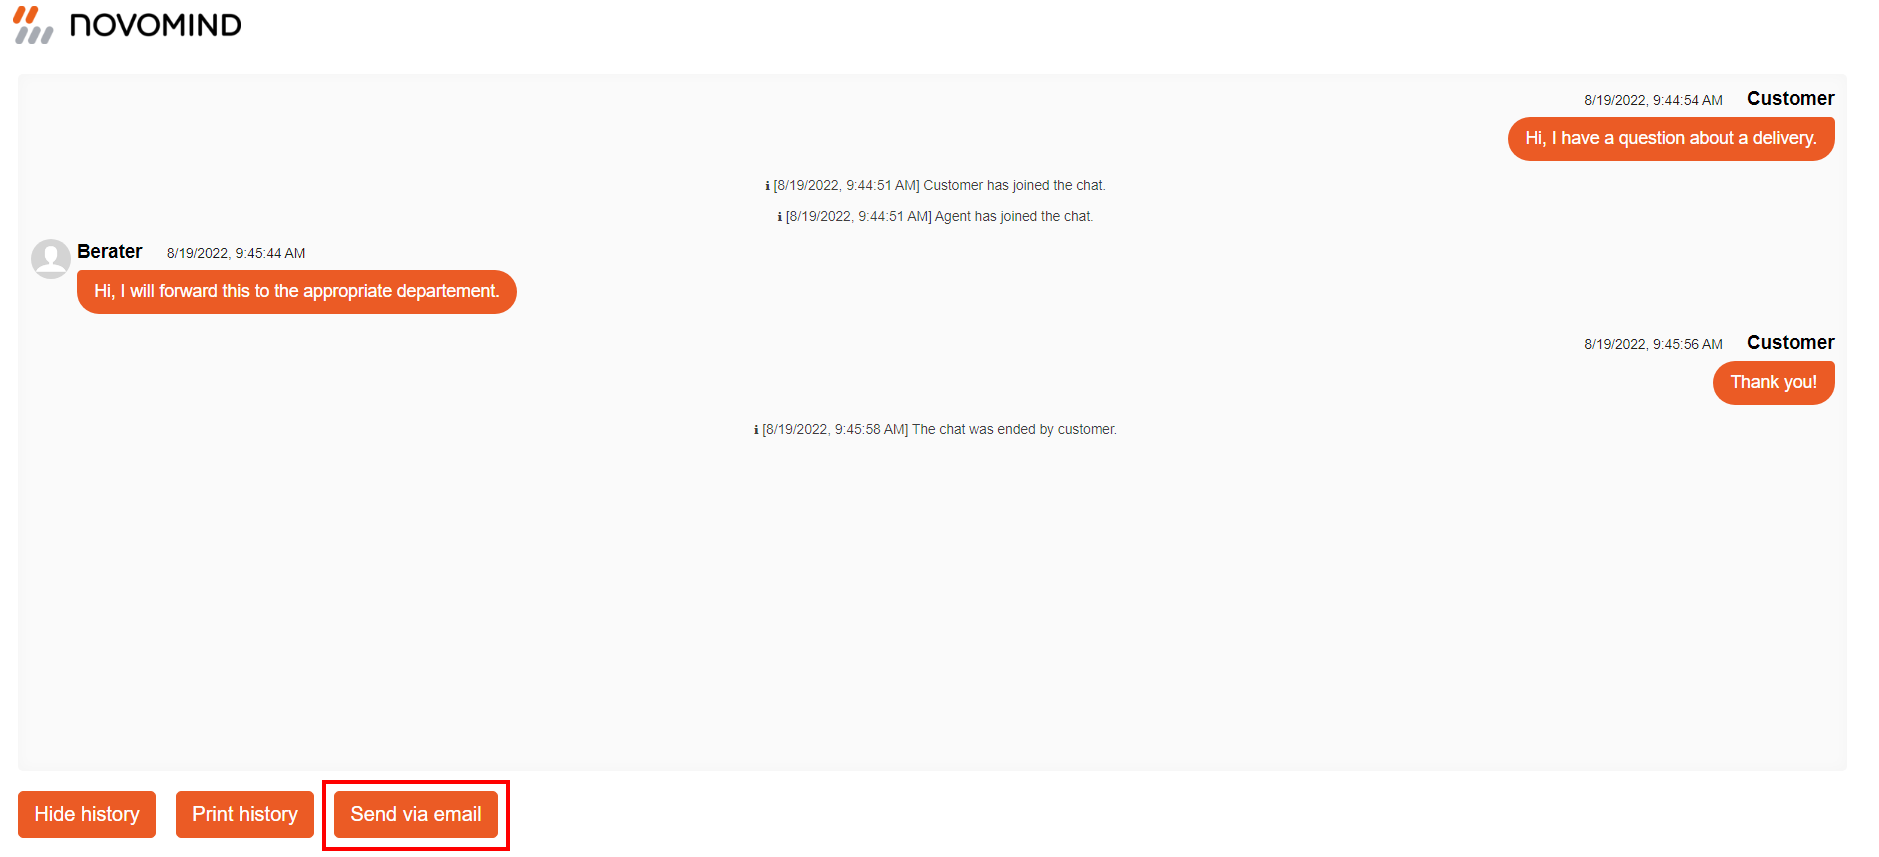
After a live chat with an agent via the chat frontend, the customer can view the chat history. To do this, the Show History button is available after the chat has been quit. Afterwards, the history can be printed or sent by mail.
Display of chat history after clicking on ‘Show history’
In order for the customer to be able to receive the history by mail, some settings are required in the Supervisor settings for the chat frontend, the answer templates and the system parameters.
In the frontend settings (Administration -> Chat -> Frontend) under the Configuration tab, the setting Chat history per email must be activated for the corresponding frontend.
Next, a reply template must be added (Administration -> Answers -> Templates), in which the chat history is embedded and sent. To do this, create a new template under the File tab and name it chat_report.txt. To integrate the chat history into this template, the template variant can be used and customized as needed.
<INCLUDE NAME="/include/default_header.txt">
You receive the chat history as requested. -------------------------------------------
<JAVASCRIPT> function getDummyChat() { var ChatStepDummy = Java.type("com.novomind.ecom.template.chat.ChatStepDummy"); return new ChatStepDummy; }
function getFormatedTime(timestamp){ var SimpleDateFormat = Java.type("java.text.SimpleDateFormat"); var sdf = new SimpleDateFormat("HH:mm:ss"); return sdf.format(timestamp); }
function getChatSteps(chat, isiMailServer){ if(isiMailServer){ var ChatHistoryContent = Java.type("com.novomind.chat.common.com.history.ChatHistoryTextContent"); var chatContent = new ChatHistoryContent; return chatContent.getTextChatSteps(chat); }else{ return chat.getChatSteps(); } }
var chat; var isiMailServer; try{ chat = getChat(); isiMailServer = true; }catch(err){ chat = getDummyChat(); isiMailServer = false; }
var out = ""; var isiMailServer; var chatSteps = getChatSteps(chat, isiMailServer); var chatStep; var count = chatSteps && chatSteps.size() || 0;
for (var i = 0; i < count; i++) { chatStep = chatSteps.get(i); if (chatStep) { var timeStamp = getFormatedTime(chatStep.getTimestamp()) var nickName = getNickname(chatStep, isiMailServer); var message = chatStep.getContentDisplay(); if(chatStep.getType() != com.novomind.ecom.chat.IChatStep.TYPE_BROWSE){ if(chatStep.getType() != com.novomind.ecom.chat.IChatStep.TYPE_MESSAGE){ out += "[" + timeStamp + "] ( i ) " + nickName + ": \t\t" + message + "\n"; }else{ out += "[" + timeStamp + "] \t " + nickName + ": \t\t" + message + "\n"; } } } }
out </JAVASCRIPT>
-------------------------------------------
We hope we could answer all your questions.
Finally, two system parameters need to be added (Administration -> System -> System Settings). Under the System Parameters tab, a click on New opens the Add dialog. The name of the parameter is entered under Key: chat.sendmail.template, Value is the name of the added template (chat_report.txt – if the mail should be sent as html, a corresponding template must also be added and entered here as value instead). With OK the input is confirmed and afterwards another parameter is added: This parameter is called chat.sendmail.accountid and contains as a value the ID of the incoming account that should be used to send the mail (this can be viewed under Administration –> System –> Incoming accounts, under the General tab at the very top). Again, the entry is confirmed with OK, then save settings.