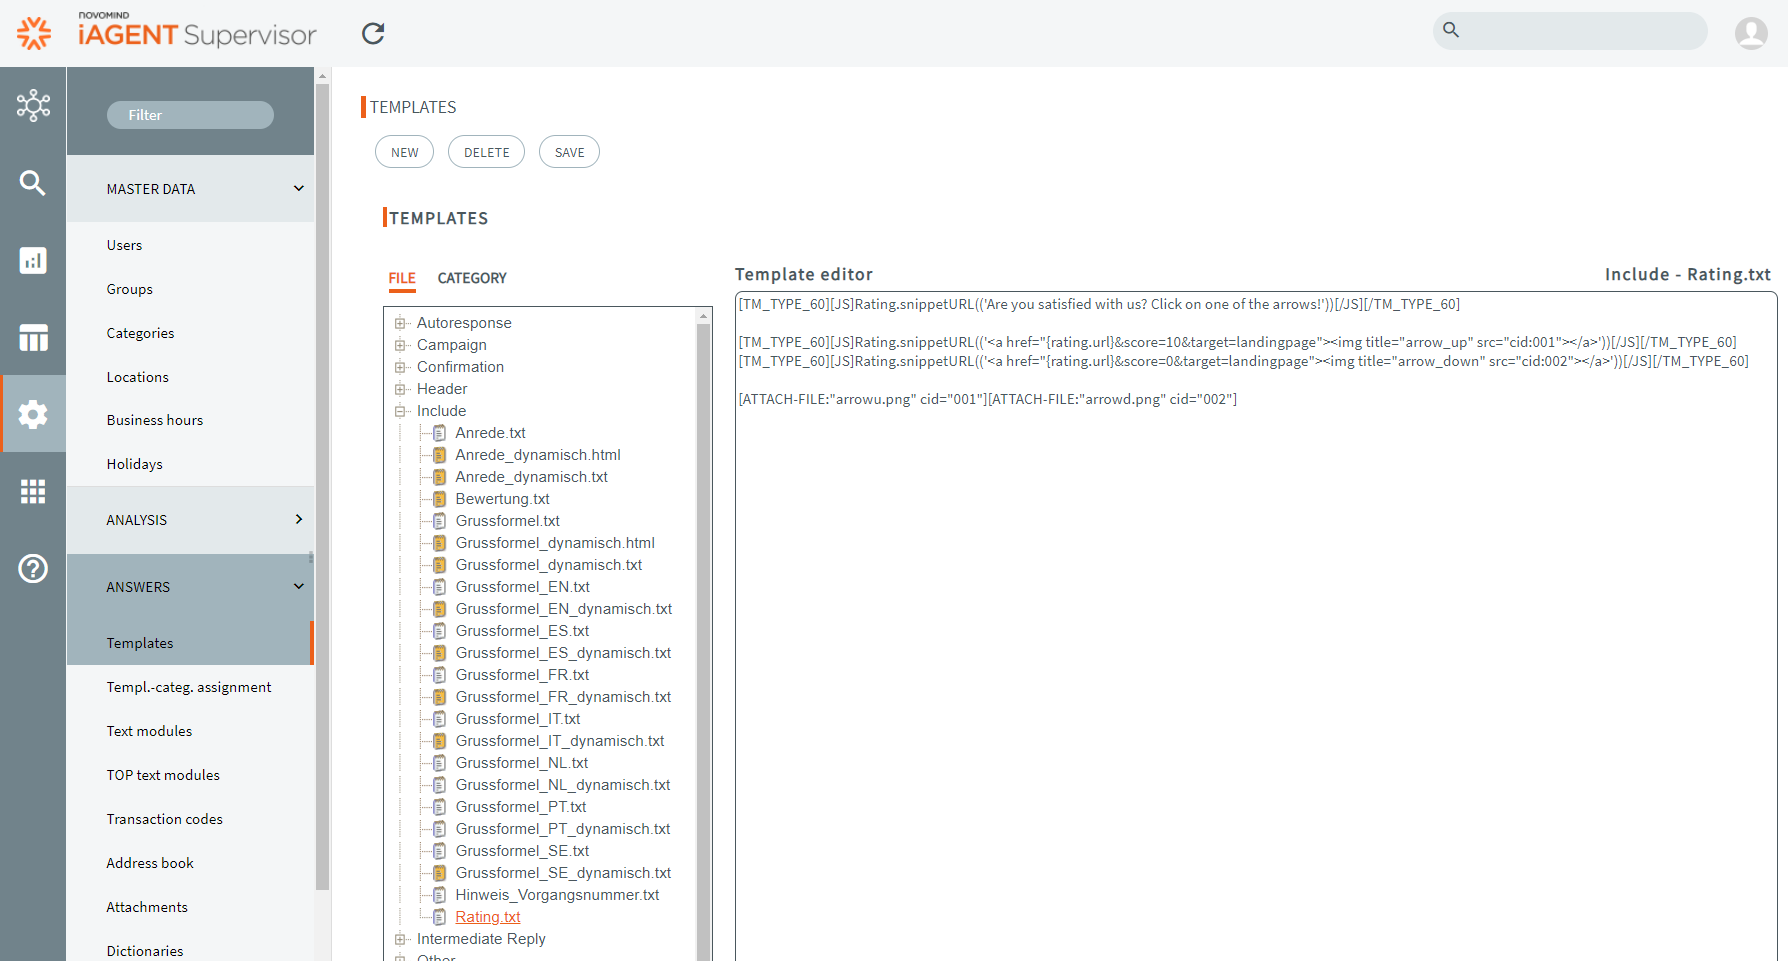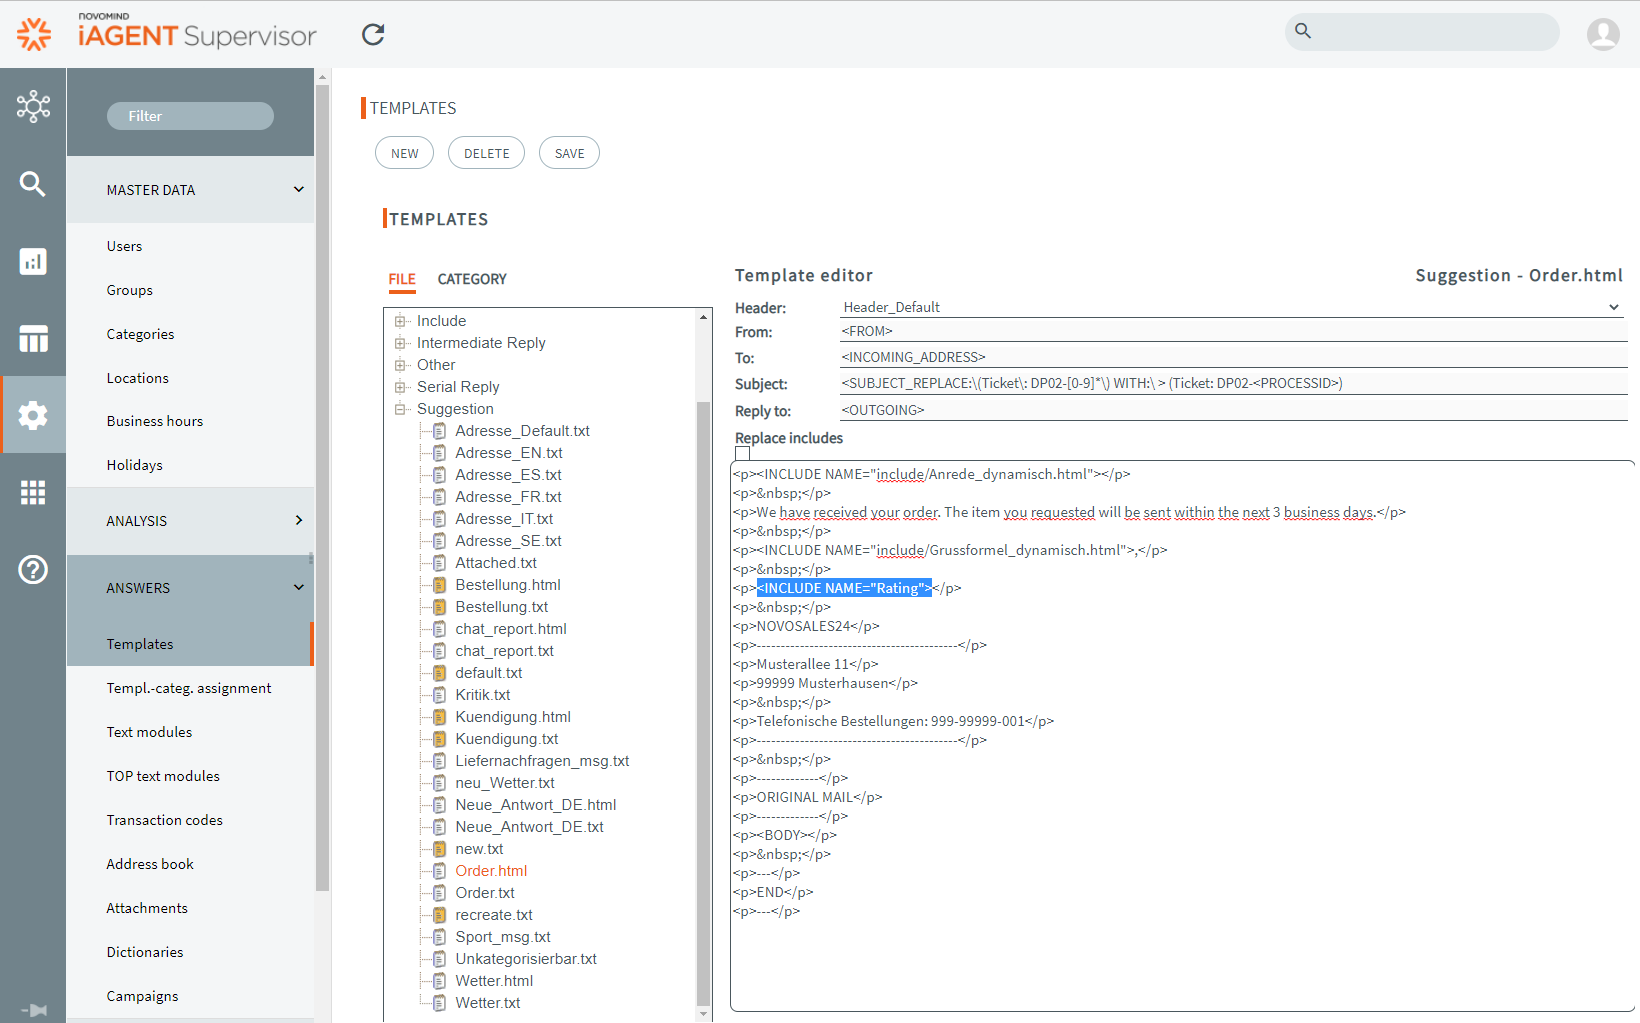
The rating feature allows agents to send customers a link to rate correspondence. This chapter describes how to create an email template that can be sent manually or automatically to solicit customer ratings. The template sends three smiley faces as images to customers. Customers can click on them to provide feedback.
Inhalt/Content
Prerequisites
- iAGENT version 13.9.5 or later must be installed
- A rating frontend must be configured, and the value nmIQL.cfg must be entered for the rating.client.url parameter.
Settings in the Supervisor
Upload Images as Attachments to iAgent
First, the images must be uploaded to the iAgent Supervisor interface. This can be done under Administration > Answers> Attachments. New attachments can be added using the Upload button. In the dialog that opens, you can select a client or the setting Client: unassigned. The client setting cannot be changed after uploading.
Create response templates for automatic and manual sending
Create a response template to be sent to customers who are asked to submit a review.
1. Go to Administration > Responses > Templates.
2. Create a new template of type “Agent” (for manual sending to customers by agents) or “Auto” (for automatic sending).
3. Open the “Content” tab.
4. Click on an empty spot in the content.
5. Click the image icon in the toolbar and select the “[Script]” option.

- An empty image icon will appear in the content, and in the attachments you’ll see a “chip” with a sample image name enclosed in a [JAVASCRIPT] tag:

6. Click the chip and customize the image name.

- Optional: If you do not want a rating to be sent with every email using this template, you can use a short IF function in the JavaScript block. Example: You can query a ticket property (CRM tab) named “sendRating.” The script will only insert the attachment if the value is “true.”
[JAVASCRIPT]wrapper.getStorage().getBoolean('sendRating') ? Rating.insertImage('happy.png') : ''[/JAVASCRIPT]
Instead of [JAVASCRIPT], you can also use the shorthand [JS] here:
[JS]wrapper.getStorage().getBoolean('sendRating') ? Rating.insertImage('happy.png') : ''[/JS]

- Note: Use the following expression to read the values of the ticket property: wrapper.getStorage(). Depending on the type, getBoolean() or getString() can also be used.
7. Repeat this step for each image (rating values) until all uploaded images have been entered.

8. Click at the desired location in the content area and select “Dynamic Areas” > “Unchangeable area”.
-
-
-
-
- A placeholder for the uneditable area appears.
-
-
-

- A placeholder for the uneditable area appears.
9. Über das Menü „Entwickler -> JavaScript“ mit dem Auge-Icon für die manuellen Antworten auswählen. Für automatische Antworten die Option „Entwickler -> Javascript” mit Pfeil wählen.

-
-
-
-
- The dialog for inserting the script opens.
-
-
-
10. In the dialog, create links and text (as shown in the example script below). Add links and values to images in the JavaScript. Use the Rating.snippetURL() function.
Sample script for manual responses:
var output = "";
if (wrapper.getStorage().getBoolean('sendRating')) {
output = "Wie zufrieden waren Sie mit dieser Antwort?<br>"+
Rating.snippetURL('<a href=\"{rating.url}&rating=10&tenant=de_eventim&lang=de_de\"><img src=\"cid:xxxx\" width=\"4%\"></a>') + " " +
Rating.snippetURL('<a href=\"{rating.url}&rating=5&tenant=de_eventim&lang=de_de\"><img src=\"cid:xxxx\" width=\"4%\"></a>') + " " +
Rating.snippetURL('<a href=\"{rating.url}&rating=1&tenant=de_eventim&lang=de_de\"><img src=\"cid:xxxx\" width=\"4%\"></a>');
}
output;
Sample script for automatic replies:
var output = "";
if (wrapper.getStorage().getBoolean('sendRating')) {
output = "Wie zufrieden waren Sie mit dieser Antwort?<br>"+
Rating.snippetURL('<a href=\"{rating.url}&rating=10&tenant=de_eventim&lang=de_de\"><img src=\"cid:xxxx\" width=\"4%\"></a>') + " " +
Rating.snippetURL('<a href=\"{rating.url}&rating=5&tenant=de_eventim&lang=de_de\"><img src=\"cid:xxxx\" width=\"4%\"></a>') + " " +
Rating.snippetURL('<a href=\"{rating.url}&rating=1&tenant=de_eventim&lang=de_de\"><img src=\"cid:xxxx\" width=\"4%\"></a>');
}
output;
- Note: Due to the fixed section (template tag [TM_TYPE_60]), the entire rating section becomes read-only and cannot be modified by the agent.
11. Apply changes by clicking the “Save” button. The content now looks like this:

12. Switch to the source code editor using the “Source” radio button. In the source code, within the opening script tag, add the attribute escape=”false”:
[JAVASCRIPT ESCAPE=”false”].
13. Copy and paste the Content IDs (CID) of the three images above into the snippletURL parameter in the script block, replacing the “xxxx” placeholders. To assign a Content ID to an image: Hover your mouse over the entry at the top under “Attachment” and read the Content ID from the tooltip.

- Note: Assign the correct Content ID to the image URL parameters, as the order of the images here may not be correct. Open the tooltip to identify the CID.
14. The images that were previously added can now be deleted (<div><img src=”cid:6e6f766fcd.11.0.19f4127bc10.35c0ce93″</div>).
The content in the source code editor now looks like this:
<div>we changed your address data in our system.</div>
<div> </div>
<div>[TM_TYPE_60][JAVASCRIPT]
var output = "";
if (wrapper.getStorage().getBoolean('sendRating')) {
output = "Wie zufrieden waren Sie mit dieser Antwort?<br>"+
Rating.snippetURL('<a href=\"{rating.url}&rating=10&tenant=de_eventim&lang=de_de\"><img src=\"cid:6e6f766fcd.11.0.19f4127bc10.35c0ce93\" width=\"4%\"></a>') + " " +
Rating.snippetURL('<a href=\"{rating.url}&rating=5&tenant=de_eventim&lang=de_de\"><img src=\"cid:6e6f766fcd.11.0.19f4120059f.1c499574\" width=\"4%\"></a>') + " " +
Rating.snippetURL('<a href=\"{rating.url}&rating=1&tenant=de_eventim&lang=de_de\"><img src=\"cid:6e6f766fcd.11.0.19f4126b8b8.37b4b261\" width=\"4%\"></a>');
}
output;
[/JAVASCRIPT][/TM_TYPE_60]</div>
- Note: For automatic replies, use <JAVASCRIPT> instead of [JAVASCRIPT][TM_TYPE_60].
15. Apply the changes by clicking the “Save” button.
16. Go to the “Assignments” tab of the response template. For manual responses, set the assignment type to Alternative Response Suggestion. For auto-responses, set the assignment type to Batch Response and assign it to the desired category.

The response template is now complete.
WARNING
If further changes are made to the template at a later time, it is important to switch back to the source code editor before saving and ensure that no incorrect download links have been automatically generated within the script block. If this is the case, these incorrect download links must be manually removed before saving and replaced with the original script block (see above).
Below is an example where subsequent changes to the template caused incorrect download links to be generated within the script block:

Customizing Category Settings
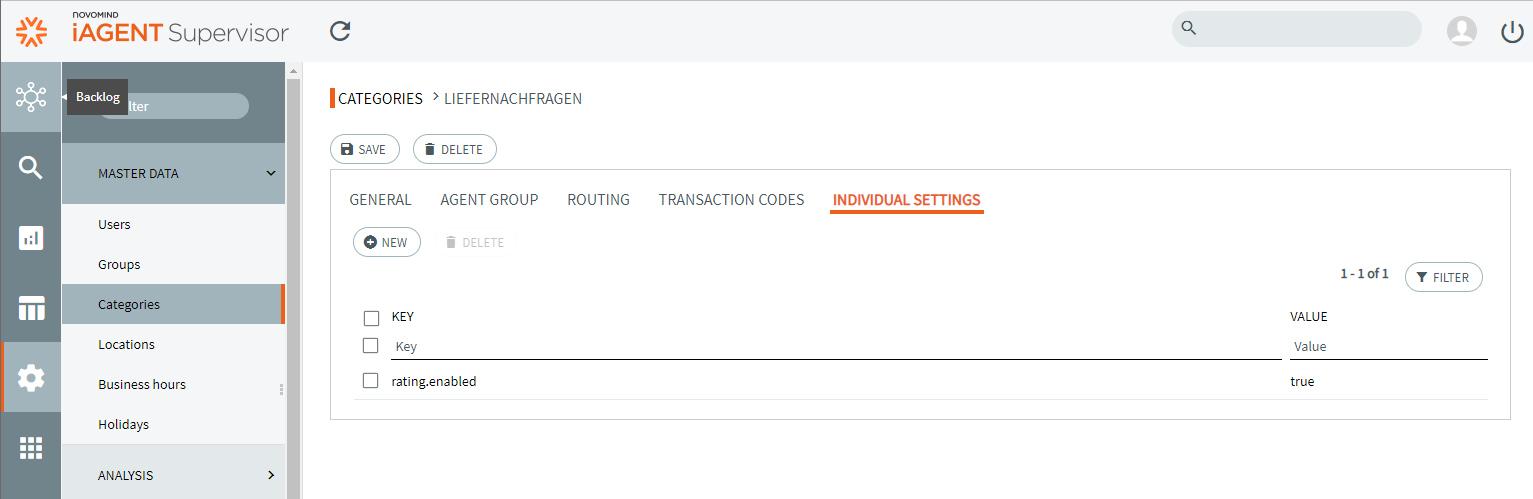
- If the parameter rating.enabled is set to “false” (default value = true): Go to the settings for the category in which the rating is to be requested. To do this, click on the desired category under Administration > Master Data > Categories. Under Custom Settings, use the New button to enter a new key rating.enabled with the value “true.”
- For automatic replies: If the email containing the rating is to be sent automatically to customers, the “Automatically reply to emails” option must be enabled in the corresponding category (Routing tab in the category settings), and the reply template containing the rating must be referenced there, e.g.:

Use in iAgent Desk
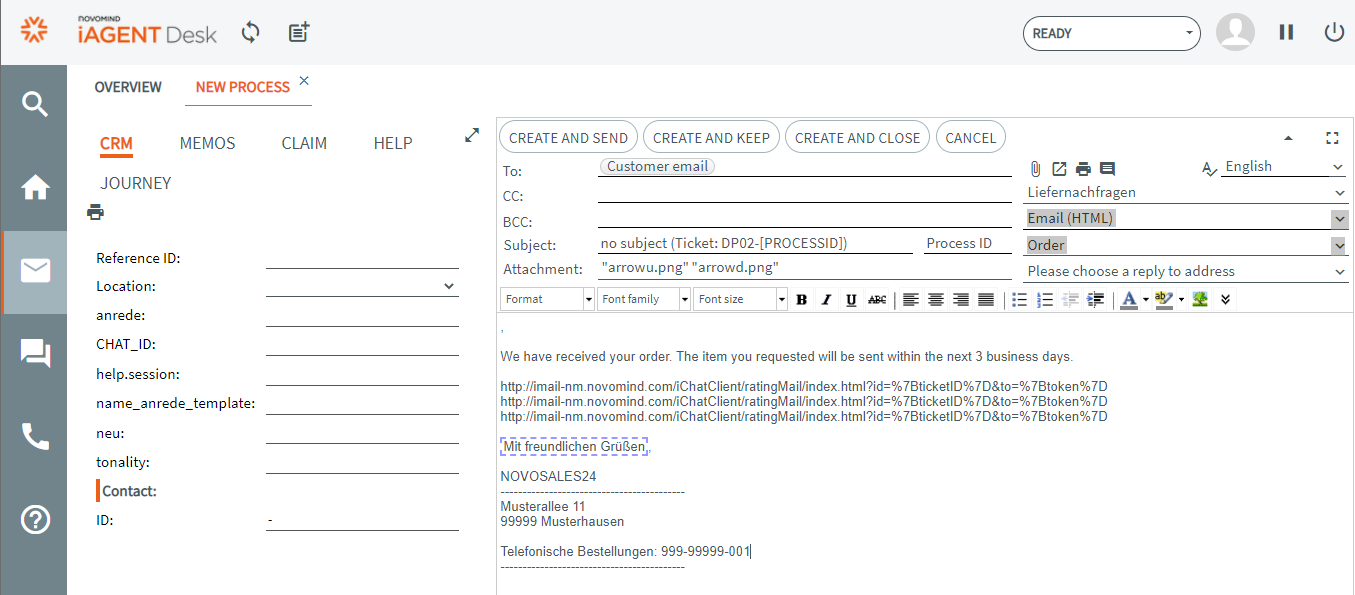
After selecting the appropriate category, select Email (HTML) as the response channel in the upper-right corner. In the template dropdown below, select the appropriate template with the rating images, and it will be displayed in the preview: