To create a Call Flow, the components are dragged and dropped from the right-hand menu onto the desktop and linked together.
A call flow must always start with a Connect component and is then run through “from top to bottom”. The mouse wheel can be used to zoom in and out of the interface.
The components are connected via connecting lines and with the help of so-called ports. Only output ports can be connected to input ports via connection lines. Double-clicking on the connection line inserts a point on the line, which can be used to move the line freely on the desktop for a better overview.
Generally, components have both an input port and an output port. However, there are also components where an output port has been omitted because it is not required due to the scope of the function. For example, in the case of the Disconnect component, there is no outgoing port because the Call Flow is automatically terminated after the call is disconnected. The opposite is true for the Connect component, which is basically the first component in a call flow. An incoming port on this component is therefore not required. Furthermore, there are components that additionally have so-called error ports. These are always triggered in the call flow if an event defined in the component configuration occurs (such as the caller exceeding the maximum number of invalid entries or a queue timeout).
Above the component menu there are two arrows. These can be used to repeat or undo the last action(s) performed, and the help texts can be displayed and hidden by clicking the question mark icon.
If faulty JavaScript code is generated due to an error in the Call Flow Designer when creating a call flow and a new version of the Call Flow Editor app is then released, the faulty call flow must be opened and saved once with the new app. This is because the JavaScript code for the call flow is always generated based on the components in the Call Flow Designer shortly before saving. It is also advisable to check the individual component settings once again, as settings may have been added there for which – if not set – a defined default value applies.
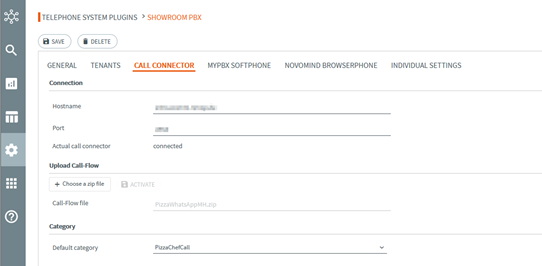
Once the call flow has been created, it can be saved locally using the Download button. To activate the call flow on the IVR system, it must be uploaded and activated in the novomind iAGENT Supervisor (under Administration –> System –> Telephonesystem Plugins –> Call Connector).