In the Call Flow Designer, the user has the option of connecting the available components with each other on a graphical interface and thus creating flow diagrams for the processes of incoming calls. The components are generally structured in such a way that, with a few exceptions, each component has an input and an output via which they can be connected to each other. A white box on the top always represents an input and the box on the bottom is an output. Depending on the component, there are different numbers of inputs and outputs. Separate to this are the outputs on the right-hand side, which are usually always intended for an “error condition”- such as the output in the event of a specified timeout being reached for the queue component.
In order to be able to design call flows as dynamically as possible, it is also possible to use a variable instead of a fixed value when configuring components. In addition to the configuration in the queue component, this option is also available in the following components: Menu, Input, Transfer, Voice Message and Callback. It ist important that only variables of the corresponding data type (e.g. data type “number” for the maximum number of waiting slots in the queue configuration) can be selected in the standard. If the expert settings are activated, however, the selection of variables is possible regardless of the data type.
The included components as well as their respective configuration options are discussed in the following.
Inhalt/Content
Connect
The Connect component is the entry point of every IVR call flow. Without it, the application is not functional. The component can only be used once in each flow. Apart from assigning a name and an optional description, no further configuration options are provided for this component.
Disconnect

This component must be inserted at the end of each branch of the IVR call flow if the connection is to be terminated automatically by the system. Alternatively, a single ”Disconnect” component can be used to connect all branches of the call flow. Analogous to the start component, no further configuration options are provided here apart from the assignment of a name and an optional description.
Menu
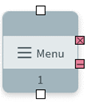
The Menu component is used to react to a single keystroke of the caller. Depending on the selected key, the corresponding subsequent branch in the call flow is then run through. The number of outputs with a respective assigned phone key is freely configurable on the Outputs tab. In addition to the definition of these different outputs (e.g. “1” for “Service”, “2” for “Delivery” and “3” for “Complaint”), the behaviour can be defined in the other tabs of the component if no input or an incorrect, unintended input is made by the caller:
![]()
In case of missing telephone key input within a certain period of time, in case of wrong input and after a fixed maximum number of such inputs, different audio files can be played. Subsequently, a caller is forwarded to the respective connected component via the corresponding error output.
The Barge-In switch in the General tab can be used to activate or deactivate the function of the same name. With activated Barge-In the caller gets the possibility to interrupt an announcement of the IVR system by pressing a key.
The Repeat Menu switch on the Bad Input or No Input tabs activates or deactivates the replay of the menu audio file after an incorrect entry by the user. The duration in seconds that the component waits for an input by the caller is entered under Timeout.
Input

This component allows the caller to enter several digits via the phone keypad which can be stored in a variable and processed further elsewhere in the process. This can be useful, for example, to make a better routing decision based on a postal code or the caller’s customer number. If speech recognition is activated, it is also possible to enter alphanumeric sequences of digits.
Under the Validation tab, Input Length can be used to specify the number of digits that must be entered by the caller.
If a Termination Character is selected, the entry is ended with this key. If no key is defined, the entry ends automatically when the maximum entry length is reached. The Input Length is unlimited if a value of “0” is entered. In the case of voice input, it is automatically shut down if no input is registered by the user for more than 800 milliseconds (customizabe period).
In addition, any number of conditions can be defined which check the length and content of the input for validity. In this way, for example, it is possible to check whether the input starts with a certain number and has a certain minimum length. Analogous to the menu component, this component also has separate outputs for incorrect and missing inputs, as well as the Barge-In switch:
![]()
Queue

This component attempts to deliver a call in the iAGENT system to an agent in a specific category. Callers remain in the queue and hear the audio file stored there until a free agent answers the call, the defined action occurs after the queue timeout or the destination stored in the overflow routing is navigated to because all available waiting slots are occupied. In the case that the queue is to be deactivated if no agent is logged in, the Timeout output is also triggered. In this context, an agent is considered to be logged in if they are logged in to the iAGENT Desk with a phone device, the status in the bar on the left has been activated for the Call channel, and it is not in the Pause status.
This option can be found on the Queue Configuration tab:
![]()
The parameter Skip intro audio if caller had already been in another queue can be used to prevent the intro announcement from being played again to a caller who has already been in another queue and who was then forwarded to the current queue during overflow, for example. This is especially useful if the caller should not notice the forwarding between two queues. The further configuration options concern the maximum number of waiting places that should only be available as well as the timeouts. Here there is the timeout for the queue itself, i.e. when the delivery to available agents is to be aborted, as well as the timeout for an individual agent, so that after the time limit has expired, for example, an attempt can still be made to deliver the call to a second agent.
In addition, the call recording (see tab of the same name) can be configured in this component by first selecting the call participants to be recorded. The following options are available:
- Agent
- Customer
- Agent and Customer
If Customer or Agent and Customer is selected here, two audio cards open automatically, where firstly an audio file is to be selected, which informs the caller about a possible call recording and secondly the audio file, which confirms to the caller after an opt-out that the call will not be recorded. Furthermore, the DTMF key is selected here, with which the caller can give their consent.
The required data volume for call recordings if both agent and caller are recorded is 3 KByte per second. If only one party is recorded (agent or customer), 1.5 Kbytes per second can be assumed. ![]() The recording of telecommunications services is only possible in compliance with the applicable legal requirements, in particular, as a rule, the express consent of the persons concerned must be available.
The recording of telecommunications services is only possible in compliance with the applicable legal requirements, in particular, as a rule, the express consent of the persons concerned must be available.
Switch
With the Switch component, a call can be forwarded to one of any number of defined outputs. Each output has its own conditions, which can be configured in this component. Either existing variables can be used for the comparison under the Conditions tab or a new variable can be created directly. The component also has a standard output on the right-hand side, which is automatically activated if none of the conditions are met.
The Switch component can be used, for example, to implement geographical routings (e.g. different routing for calls from mobile networks or depending on the country of origin) or VIP routings based on a previously validated customer number.
It is also possible to route calls with suppressed number (CLIR) differently from the calls where the number is transmitted (CLIP). This is possible by storing the following condition: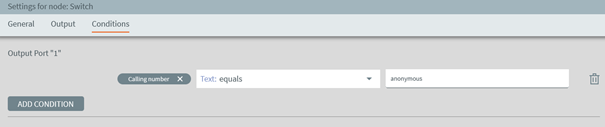
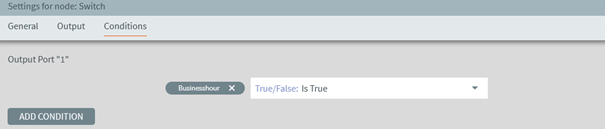
Furthermore, routings can also be implemented depending on a business time previously set via the action component or based on holidays. For routing based on business hours, the comparison operator “True/False” must be selected under the Conditions tab. Then, all calls received during the business hours previously set via the action component will be routed to the respective output (in the example below, “Output Port 1”).
The calls received outside the set business hours will be routed accordingly to the output of the component that is intended for the non-fulfillment of the configured condition.
Notes on the consideration of business hours:
- If no business hours are set in the Call Flow and no business hours are stored in iAGENT, “within the business hours” applies
- If no business hours are set in the call flow, but a business hour is stored in the category or a global business hour in iAGENT, the category-specific or global business hours are taken into account
- If business hours were set in the call flow and no business hours are stored in iAGENT, “within the business hours” applies
- If business hours are set in the call flow, which are stored in iAGENT, the corresponding business hours apply
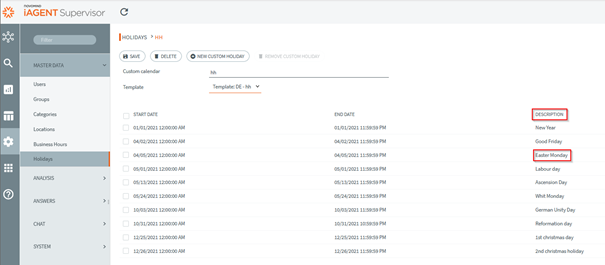
To set up holiday routing, select the Holiday variable under Conditions. The holidays that can be considered in the routing are based on the respective business hours. The options mentioned under type Text are available as comparison operators. So, for example, if incoming calls on Easter Monday are to be routed to output 1 of the Branch component, the configuration looks as follows:
If, on the other hand, a general holiday routing is to be set up that does not refer to a specific holiday, then the condition must be created so that the text field is left empty. In this case, the condition always applies if any public holiday is active in the previously set business hours at the time of the incoming call.

Possible use case for holiday routing: When an incoming call is received, a “Merry Christmas” announcement is played first and a callback option is offered afterwards.
Action
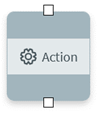
With the Action component, a previously defined action is automatically executed as soon as the call reaches the component in the call flow. The following actions are possible:
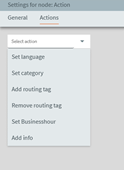
- Set language: Sets the language for the call. The available languages are managed in the Call Flow settings.
- Set category: Sets the category for the call. If the field is left empty, novomind iAGENT falls back on the stored default.
- Add / remove routing tag: Adds or removes a routing tag from the call.
- Set business hours: Sets the business hours for the call so that when business hours set here are queried (e.g. by the switch component) it is taken into account accordingly. Four different options are available in a drop-down menu for setting the business hours: Business hours of a category imported from the novomind iAGENT system, selection of business hours added in the Call Flow Designer settings under “Business hours”, selection of the business hours based on a category set in the flow, selection of the global business hours of novomind iAGENT.
 If Business Hours of Category is selected here without a category having been set beforehand, the global business hours will be used (the global business hours are set in novomind iAGENT Supervisor under Administration –> System Settings –> Service Level –> Default Business Hour. If no global business hours have been configured, the status “within business hours” always applies.
 - Add info: An information can be entered here and added to the call. On the “Call” tab of the novomind iAGENT Desk, the agent is shown both the name of the information added here and the stored value as text.
Of course, several actions can be performed at the same time.
Audio

This component is used to play an audio message in the Call Flow. Two options are available for the configuration:
Uploading an audio file from the local hard disk or directly speaking and recording the audio message (which of course requires a microphone).
Java Script

The JavaScript component can be used whenever a desired function in the Call Flow cannot be implemented using the available standard components. Any JavaScript code can be written in the JavaScript component. This is executed as soon as the component is reached in the call flow.
Voice Message

When this component is reached, the caller can leave a voice message which is sent as an attachment to the phone ticket via the iAGENT routing process. In addition to the maximum recording duration, a silence detection can also be activated in the General tab, which ends the recording early after a silence duration defined there.
In addition, it is possible to automatically discard recordings that fall below a duration defined in the component.
The email sent to the novomind iAGENT system can be configured under the Mail tab. In addition to the incoming account, subject and content of the email, the category and a resubmission time can also be set. The subject and content of the email can also be designed dynamically, as the values of variables previously defined in the call flow can be used. By entering the characters @ or #, a small menu appears from which a variable can be selected and inserted as a text module.
Recording

The Recording component allows the caller to record a message that can be reused or used in the further course of the call flow. As in the voice message component, a maximum recording duration can be defined here and silence detection can be activated.
External Request

This component is used to perform a data query via HTTP requests to an external platform (such as a CRM system) as part of the call flow. In the course of the IVR call flow, for example, the caller can be asked to enter their customer number, which is then checked against the addressed database. The answer, or even just a desired part of the answer, can be stored as JSON or string in a variable and thus be used elsewhere in the call flow if needed. In the Result Variables tab, individual values of the response can be stored in variables for this purpose.
Finally, you can test the configured request directly on the Request Test tab.
![]()
Callback
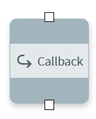
With this component, the IVR system offers the caller a callback option. This component creates a phone ticket and writes the signaled phone number or the phone number entered by the caller into the mail content (for click-to-call function).
Three different scenarios are provided in the component for entering callback requests:
- The slider Always ask caller for a callback number on the tab General is deactivated, the caller signals their phone number: This number is used/saved for the callback request (without consultation).
- The Always ask caller for a callback number slider on the General tab is deactivated, the caller does not signal their phone number: The system asks the caller for the callback number by means of the correspondingly stored voice announcement. The phone number entry must be completed by pressing the hash key.
Sample text for the audio file: “Unfortunately, we have not detected a valid callback number. Possibly the number suppression is activated. After the signal tone, please enter the phone number under which we may call you back and finish your entry by pressing the hash key.” - The “Always ask caller for a callback number” slider is activated: In this case, the caller is always asked for the callback number – even if number suppression is deactivated. For example, a mobile phone number can be stored as the callback number if the current call is from a landline.
If the caller presses the “*” key as the first entry or does not make an entry for 15 seconds, the original/signaled phone number is used.
Example of announcement text: “May we call you back on the number you are currently calling us from, please press the “star” key now and we will get back to you as soon as possible. Otherwise, after the beep, please enter the desired callback number and end your entry with the hash key.”
Call Marker
The Call Marker can be used to mark a specific location in the call flow once this component has been reached. Additional information can optionally be added to the marker. The name of the marker and the (optional) data are sent to the novomind iAGENT system and can be viewed via the Advanced Search under the Course tab.
External Forwarding
This component is used to forward a call to any destination number stored in the settings. This is useful, for example, for calls outside business hours, on public holidays and if an external overflow destination is to be addressed.
In addition to specifying the destination phone number and the phone number to be displayed at the routing destination, you can also activate Tromboning in the Transfer Settings tab of the component’s settings. If tromboning is activated, you can specify a timeout in seconds after which the call returns to the call flow if the forwarded call is not answered by the destination within the defined time window.
When tromboning is enabled, two additional outputs are automatically added to the component – an error side output and an output on the bottom of the component. The port labeled Error is used in the following cases:
- The forwarding destination is busy
- The call is not answered at the forwarding destination (possibly the timeout specified under “Timeout” has expired)
- A (technical) error has occurred
The regular output at the bottom of the component, on the other hand, is triggered when the caller has been transferred and then the connection is terminated at the transfer destination after the call has ended. In this case, the caller returns to the IVR Call Flow and follows the lower output.
Container
The Container is used to group other components and can also minimize them. This helps to keep the overview especially when using a large number of components.
The pin symbol on the container is used to pin the components it contains to the container so that they are moved along with it if the open container is moved on the graphical interface.
Via Levels the display level of a container on the graphical user interface of the Call Flow Designer can be changed. If there are at least two containers, then the containers can be moved on top of each other on different levels.
In addition, the levels define the behavior of integration from one container to another. For example, a container of level 2 can be moved and packed into a container of level 1.
The name of a container can be changed by clicking on it in the bottom left corner of the opened container.